Example Home Elevator Projects in Bellevue

Each example walks through a home elevator job: the house, where the shaft or lift goes, the building work, the schedule and an approximate cost. Many Bellevue houses date from the 1950s to the 1980s, and many are new, so the examples cover both.

These are examples, not past jobs, clients or addresses. They are put together from local house ages, the steps each kind of job usually needs and current price ranges, so you know what to expect before you ask for a quote.

Three-stop elevator starting in the garage

Example project
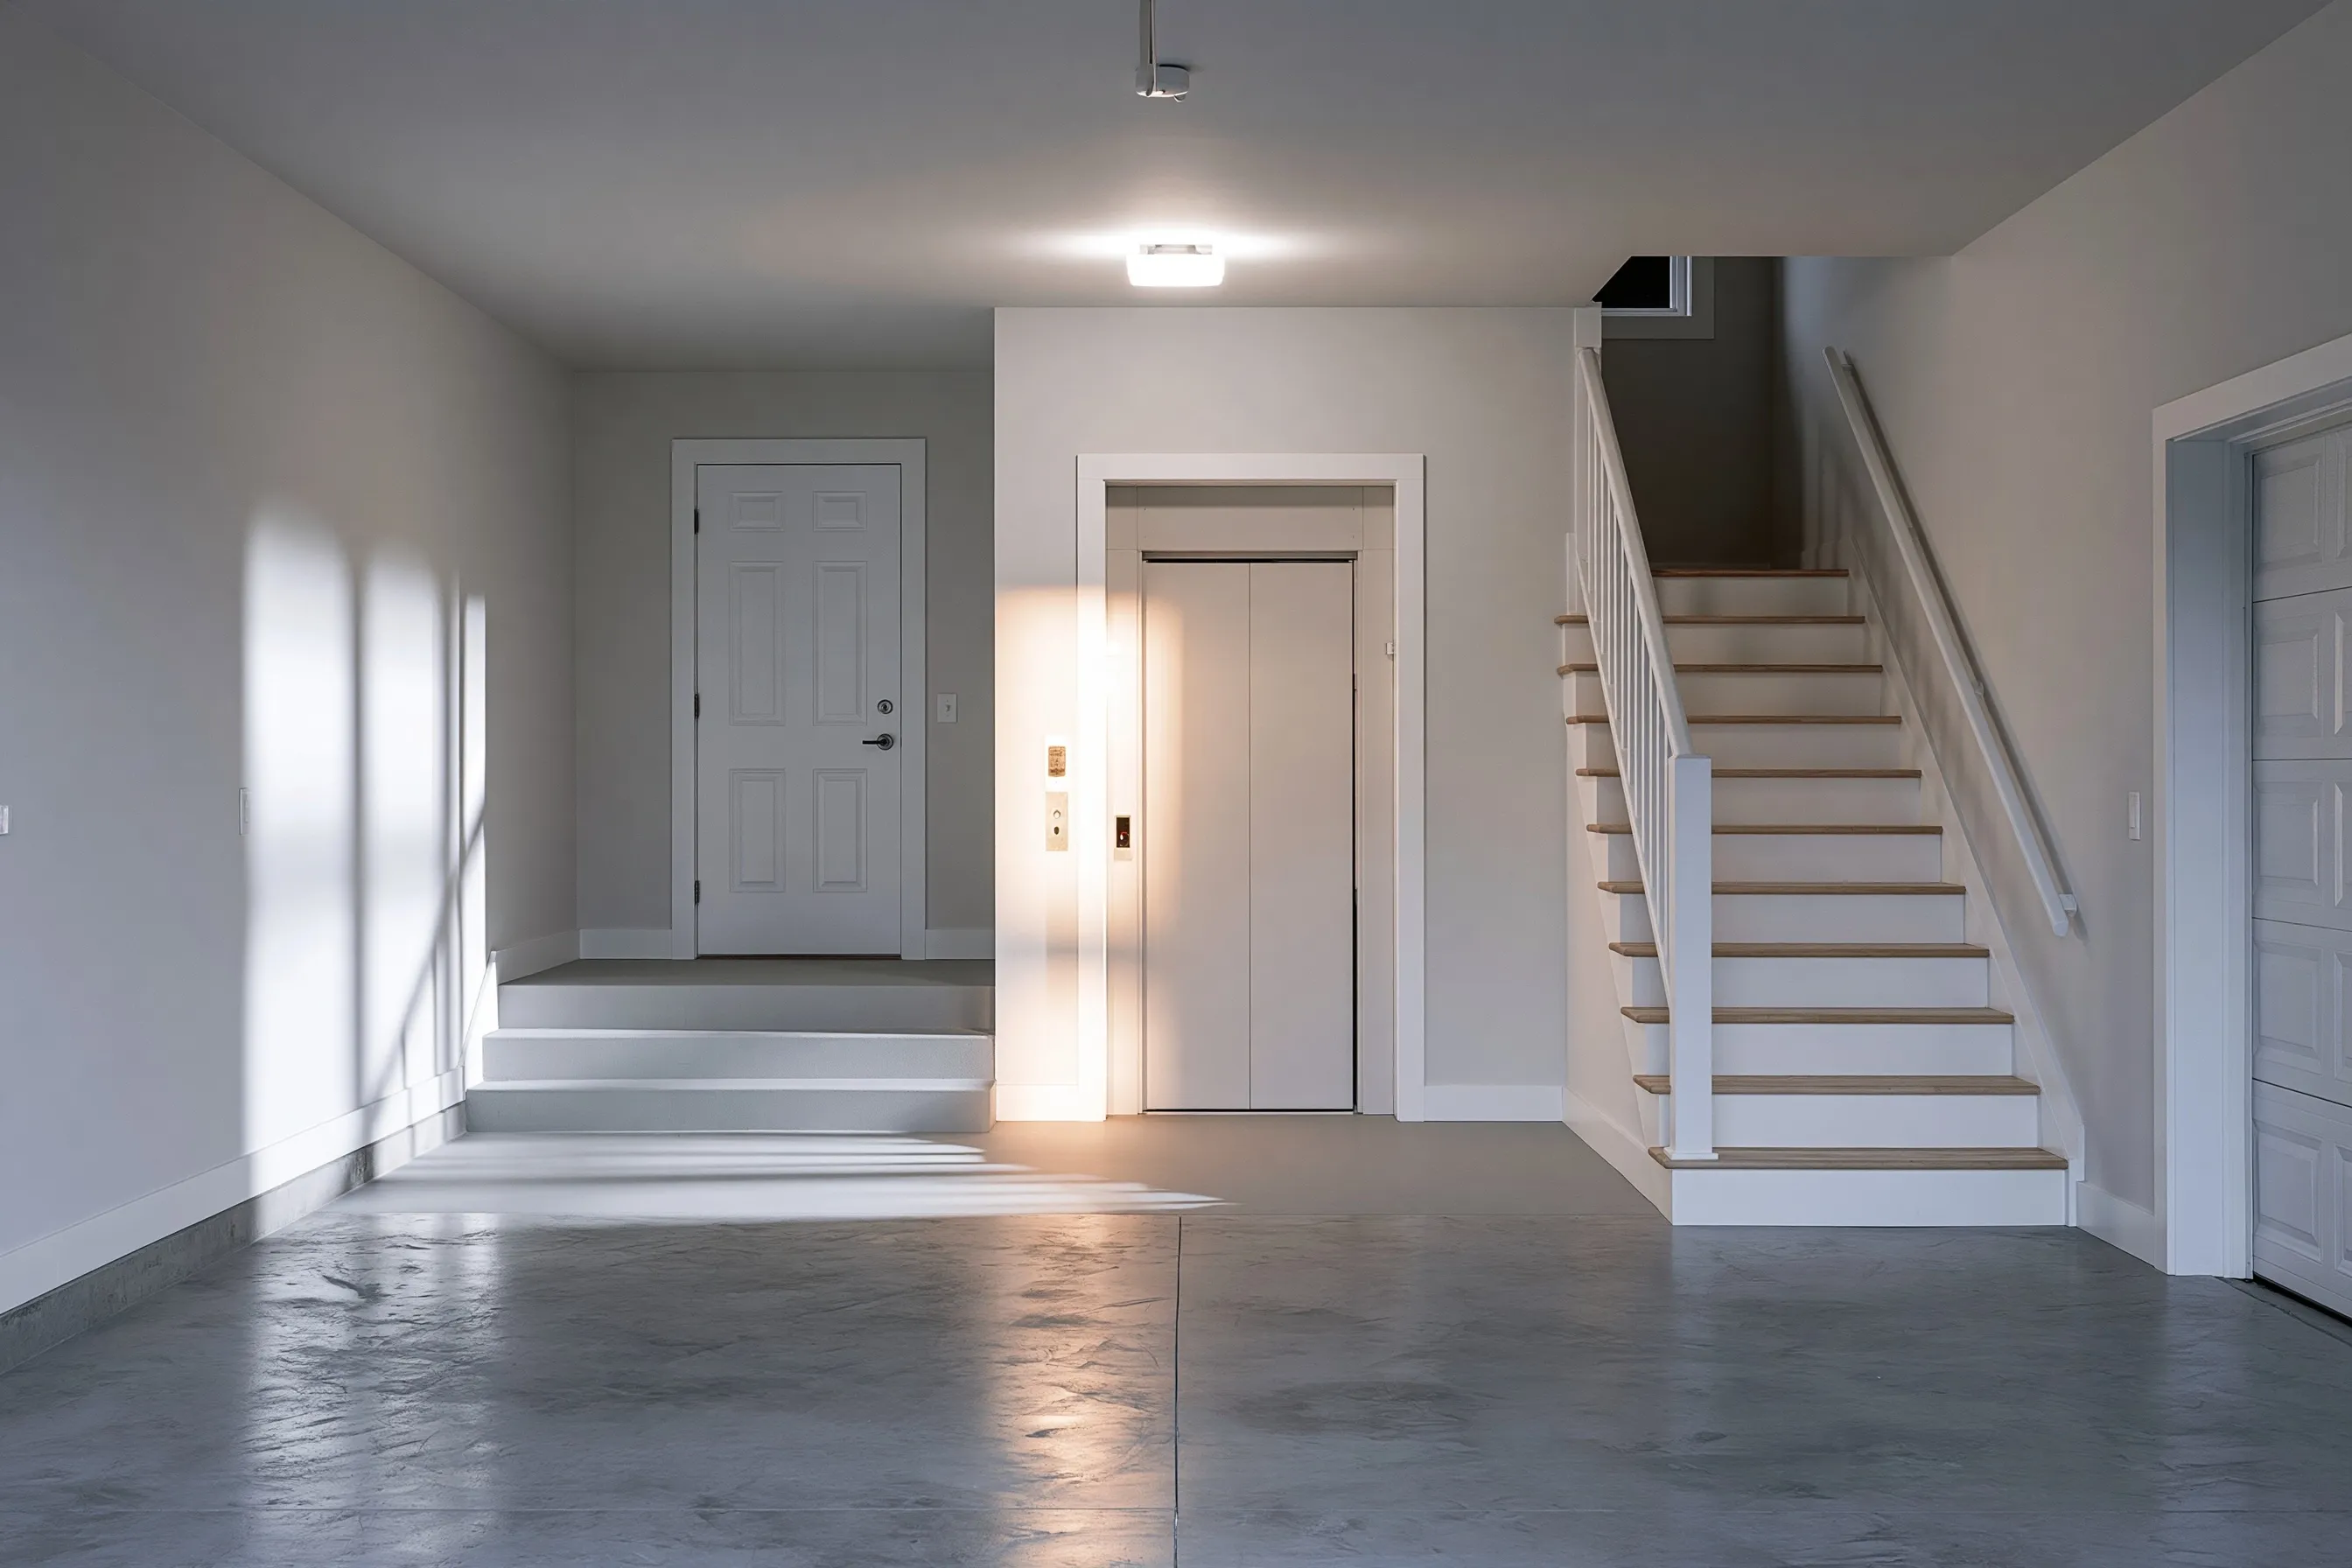
Clean attached garage with painted walls and a sealed concrete floor, a residential elevator door on the house wall beside the steps into the house
Home
2010s two-story house in Bellevue with an attached two-car garage, about 3,000 sq ft
Original request
Ride from the car to the kitchen and the bedrooms without steps
Stops
Garage level, kitchen floor and bedroom hall
Shaft
A garage corner that held storage shelves, the laundry room above it and a closet on the top floor
Elevator
Enclosed elevator, standard cab
Timeline
Four weeks or so of construction, and two more for the elevator
Estimated cost
$104,000

Scope of work

Drawings and engineering, the shelves taken out, the laundry moved over, two floor openings, the shaft framed and closed off from the garage to keep the fire separation, a power circuit, the elevator with doors at three stops, patching and paint, testing and the state elevator permit and inspection. Fees for engineering and the city permit come on top.

Project overview

In this example, the owners of a 2010s house in Bellevue carry groceries, luggage and sports gear up a few steps from the garage and then a full flight to the bedrooms. They want a step-free trip from the car to every floor, now and later.

The space comes from the garage, not from the rooms. A corner that held storage shelves becomes the bottom of the shaft, which then rises through the laundry room and an upstairs closet. The washer and dryer shift over a few feet, and the garage still holds two cars.

The goal

The goal is a step-free trip from the car to every floor, with the space taken from the garage instead of a room.

Process

  1. First visit Garage, laundry and closet measured; the car doors and parking space checked.
  2. Drawings and permits An engineer’s plan, then city and L&I permits.
  3. Weeks one to four Shelves out, laundry moved, floors opened, shaft framed and closed off from the garage.
  4. Weeks five and six Rails, cab and a door at each of the three stops put in.
  5. Finish Walls patched and painted, the ride tested and inspected by L&I, the controls explained.

Planning right

  • Park both cars in the garage before the design is final. The landing needs clear floor in front of the door.
  • A garage is kept fire-separated from the house. Ask how the shaft keeps that separation.
  • Moving a laundry adds plumbing and venting work. It is in this example’s price.
  • Ask how the elevator is lowered and the doors opened if the power goes out.

Get a free quoteMore about adding an elevator to an existing home
Larger elevator cab framed into a new two-story house

Example project

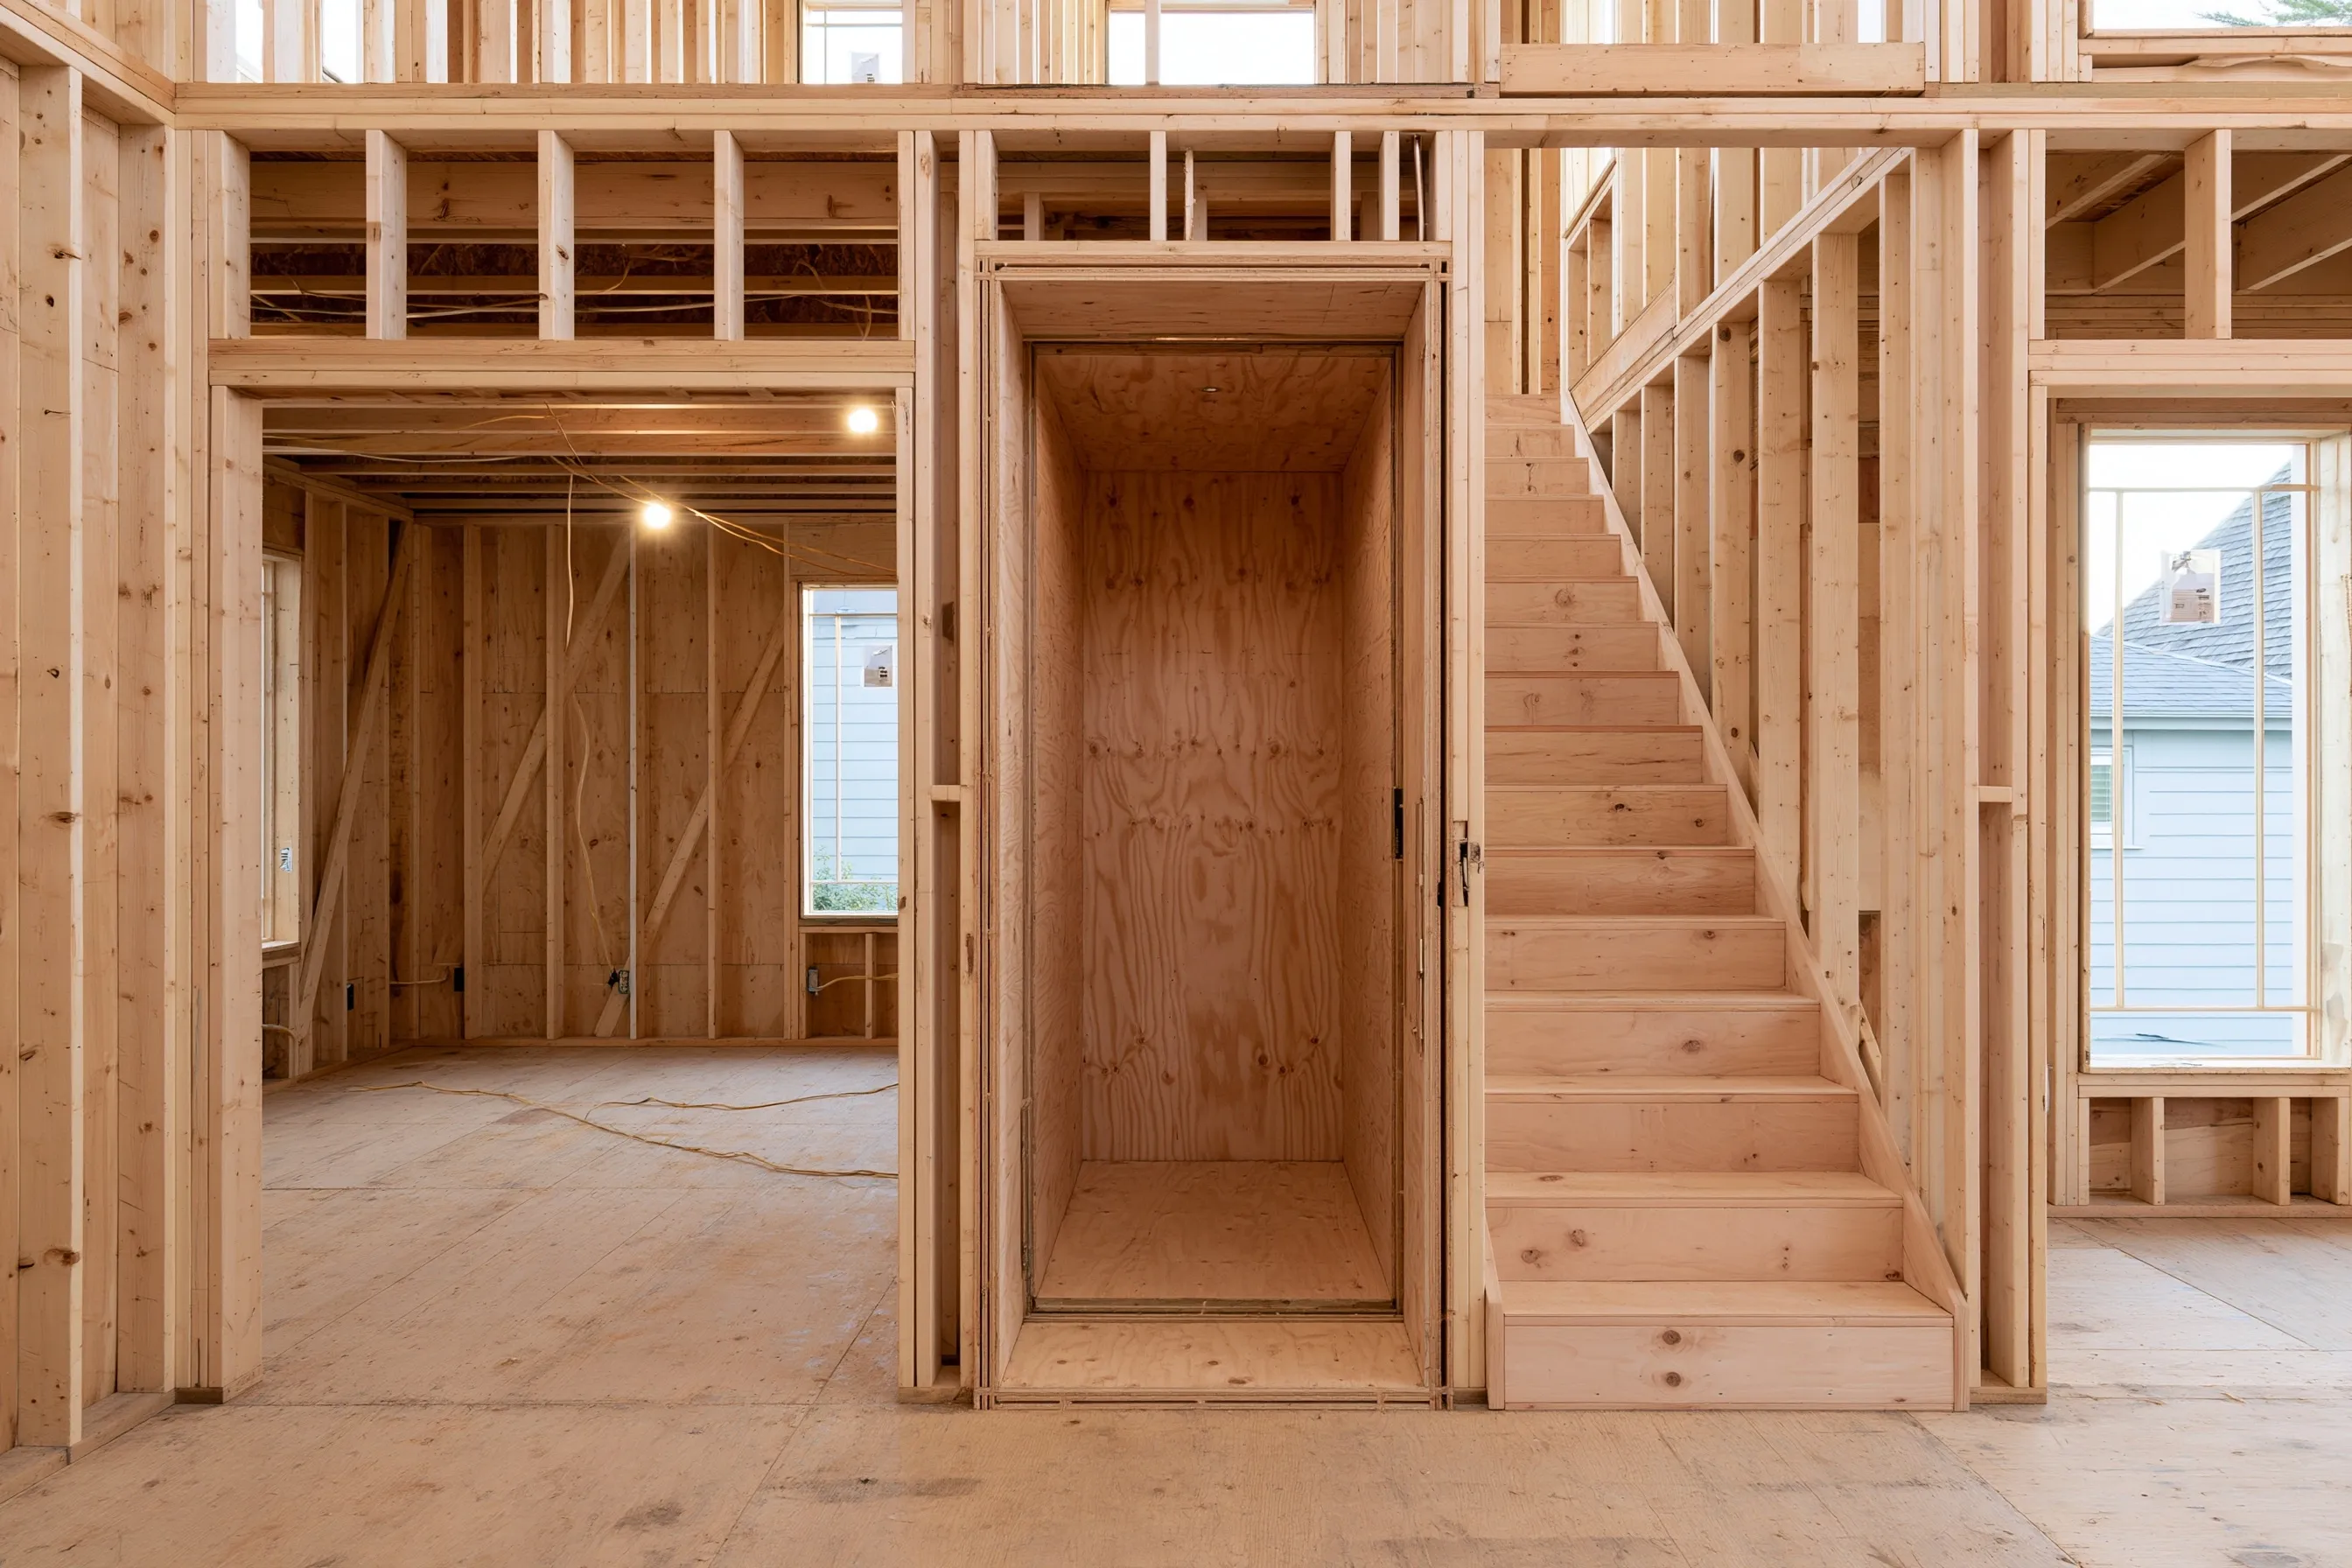
New house under construction with bare stud walls and plywood subfloor, an empty plywood-lined elevator shaft framed beside the unfinished stair
Home
Two-story Bellevue house under construction, roughly 3,400 sq ft
Original request
A roomy elevator with wood panels that matches the house finishes
Cab
Larger cab with wood panels, a handrail and better landing doors
Shaft
Framed and lined with plywood by the builder, beside the main stair, sized from the elevator drawings
Stops
Ground floor and upper floor
Timeline
Shaft framed with the house; elevator installed in about two weeks near the end of the build
Estimated elevator cost
$86,000

Scope of work

We install a larger cab with wood panels, the rails and drive, and upgraded doors on both floors. Controls, hookup, testing and the L&I permit and inspection are included. The shaft framing, pit and wiring are the builder’s work.

Project overview

In this example, a couple building a two-story house in Bellevue want an elevator that feels like part of the house, with room for two people and a few bags, wood panels and better doors than a basic model.

A larger cab needs a larger shaft, so the elevator is chosen before framing and the builder frames the shaft to its drawings. The plywood lining gives the installer something solid to fix the rails to, and the shaft waits empty until the house is nearly finished.

The goal

The goal is a roomy elevator finished to match the house, built in with no changes to the framing.

Process

  1. Design stage Cab size, finishes and doors picked; shaft, pit and power drawn into the house plans.
  2. Permit Permit sent to Washington L&I early, since an answer can take around 30 business days.
  3. Framing Shaft walls go up to the drawings, faced inside with plywood.
  4. Near the end Two weeks or so to install, followed by the L&I inspection.
  5. Move-in We go through the buttons, the cab phone and what to do in a power cut.

Planning right

  • Pick the cab before framing. A bigger cab later means a bigger shaft, which is hard to change once framed.
  • Match the cab panels to the stair or the doors nearby. Ask for samples.
  • Keep the empty shaft closed off during the build so nothing falls in.
  • Larger cabs and finer doors take longer to make. Order early.

Get a free quoteMore about elevators for new homes

Three-stop elevator added during a whole-house remodel

Example project

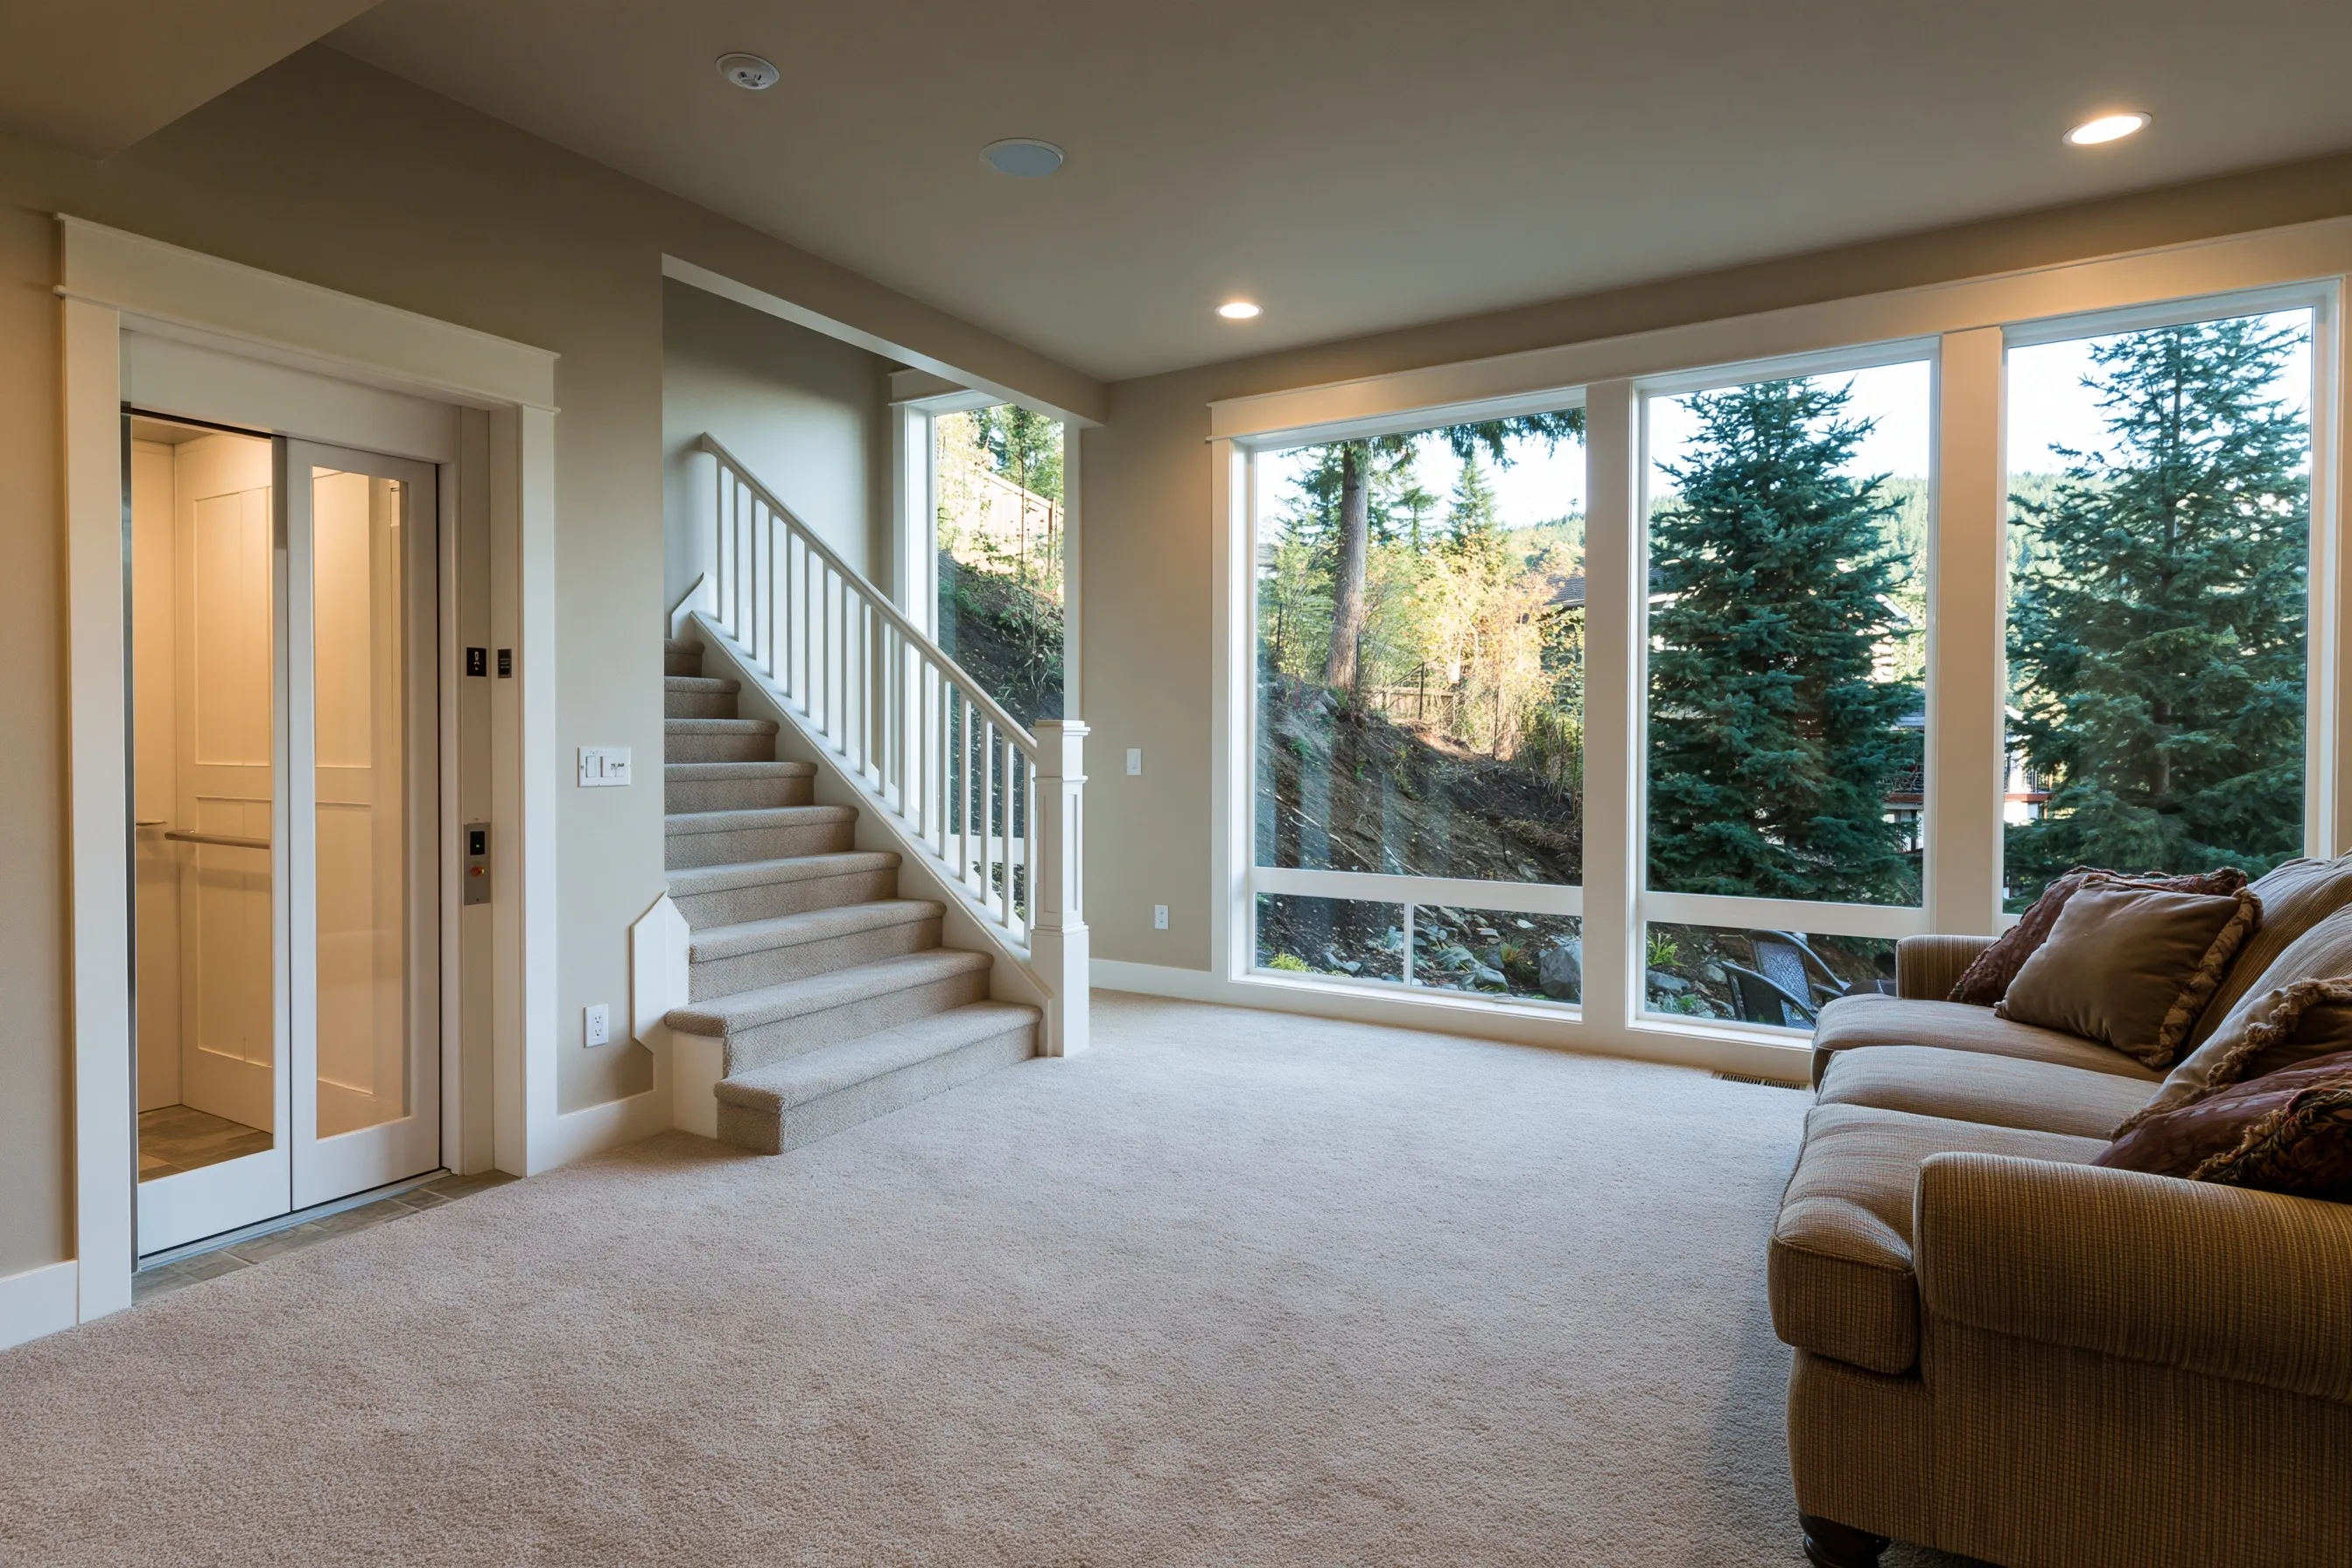
Lower-level family room with carpet and a sofa; beside the stair, an elevator door set in the wall; big windows look out on a sloped yard and evergreen trees
Home
Hillside house in Clyde Hill from the 1980s on three levels, roughly 3,000 sq ft
Original request
Add an elevator while the house is opened up for a full remodel
Floors
Walk-out lower level, a main floor and an upper bedroom floor
Shaft
Framed beside the stair by the remodel contractor while the walls are open
Elevator
Closed-cab elevator serving all three levels
Timeline
Elevator installed in about two weeks near the end of the remodel
Estimated elevator cost
$74,000

Scope of work

The remodel contractor frames the shaft and opens the floors. We then fit the cab, rails, drive, three landing doors and controls, connect and test it, and cover the L&I permit and inspection. The remodel itself is a separate contract.

Project overview

In this example, the owners of a 1980s hillside house in Clyde Hill are remodeling the whole house, with new kitchen, baths and a finished daylight lower level. With the walls and floors already open, it is the best moment to add an elevator.

The remodel contractor frames the shaft beside the stair from the elevator drawings, so the elevator itself goes in like it would in a new house. It stops at all three levels, from the lower family room to the bedrooms.

The goal

The goal is an elevator that serves all three levels, put in while the house was already open.

Process

  1. Design stage Elevator chosen with the architect; its drawings go into the remodel plans.
  2. Permits The remodel permit through the contractor; the elevator permit with Washington L&I.
  3. Framing The remodel contractor opens the floors and frames the shaft and pit.
  4. Near the end Two weeks or so to install, followed by the L&I inspection.
  5. Handover Controls and the power-loss procedure explained before the family moves back in.

Planning right

  • If a big remodel is coming, decide on the elevator before the plans are final.
  • A shaft framed during a remodel costs much less than one cut into finished rooms later.
  • Ask the architect to show the elevator doors on every floor plan, with furniture drawn in.
  • Get the elevator quote early. It sets the shaft size, the pit and the power the remodel must provide.

Get a free quoteMore about enclosed home elevators

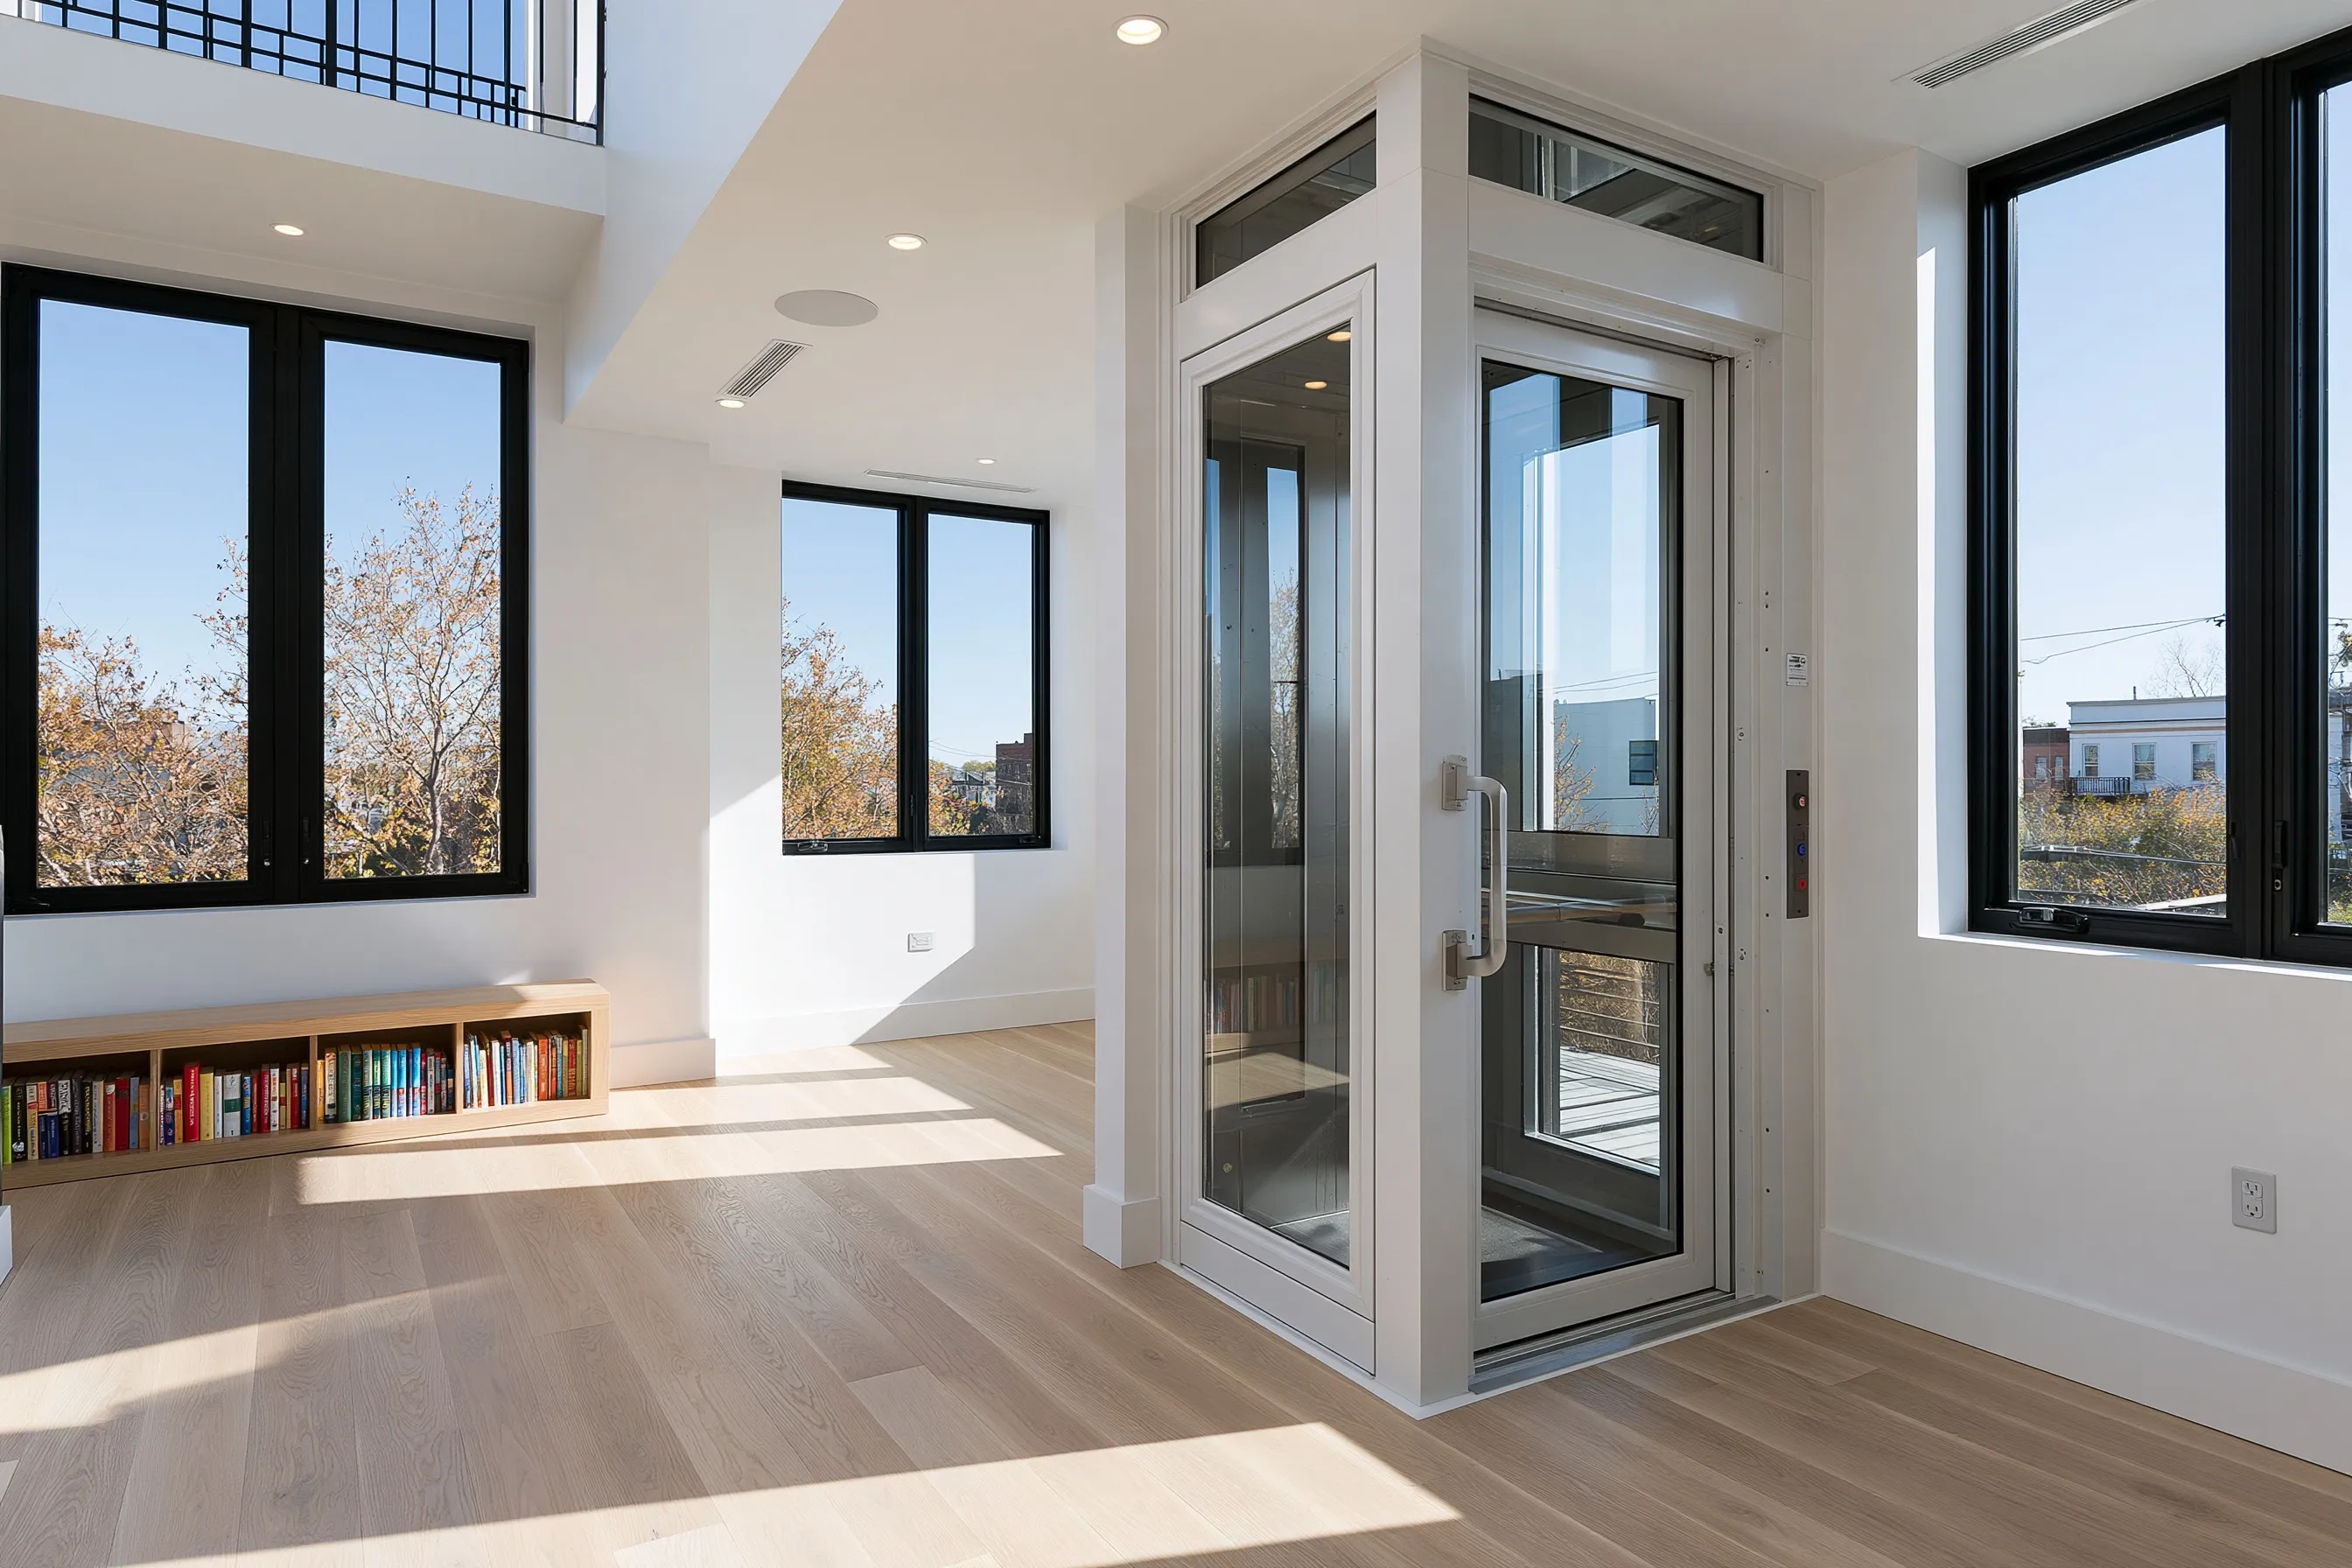
Elevator to a third-level office in a new infill house

Example project

Bright third-level room in a new house with a glass-paneled elevator door, a loft railing above and windows onto a street of low buildings
Home
Narrow infill lot in Bellevue; new modern house on three levels, a loft above part of the third level
Original request
A home office and a family room on the third level that both owners can reach easily
Stops
Entry level, main floor and third level
Doors
Glass-panel landing doors so the landings stay bright
Elevator
Enclosed elevator, standard cab
Timeline
Shaft framed with the house; elevator installed in about two weeks near the end of the build
Estimated elevator cost
$70,000

Scope of work

Three glass-paneled landing doors, the cab, rails, drive and controls go into the shaft the builder has framed. Hookup, testing and the L&I permit and inspection are part of it. The pit, framing and wiring belong to the builder.

Project overview

In this example, a couple building on a narrow infill lot in Bellevue stack the house three levels high to get the room they need. Both work from home, and the office and family room end up on the third level.

Climbing two flights several times a day is the problem, so the elevator is drawn in from the start. It stops at the entry level, the main floor and the third level, and its glass-panel doors let daylight reach each landing.

The goal

The goal is a tall, narrow house where the third-level office is as easy to reach as the kitchen.

Process

  1. Design stage Elevator, doors and shaft drawn into the house plans with the architect.
  2. Permit L&I elevator permit applied for.
  3. Framing The builder frames the three-story shaft and the pit to the drawings.
  4. Near the end Elevator and glass-panel doors installed over about two weeks, then the state inspection.
  5. Move-in We go through the buttons, the cab phone and what to do in a power cut.

Planning right

  • Each extra floor adds doors and controls. Decide on every stop before framing.
  • On a narrow lot the shaft takes floor space on every level. Place it where it does not split the rooms.
  • A quiet drive matters when the elevator sits beside a home office. Ask how loud the model is.
  • Ask where the controller sits and how a service visit reaches it.

Get a free quoteMore about elevators for new homes

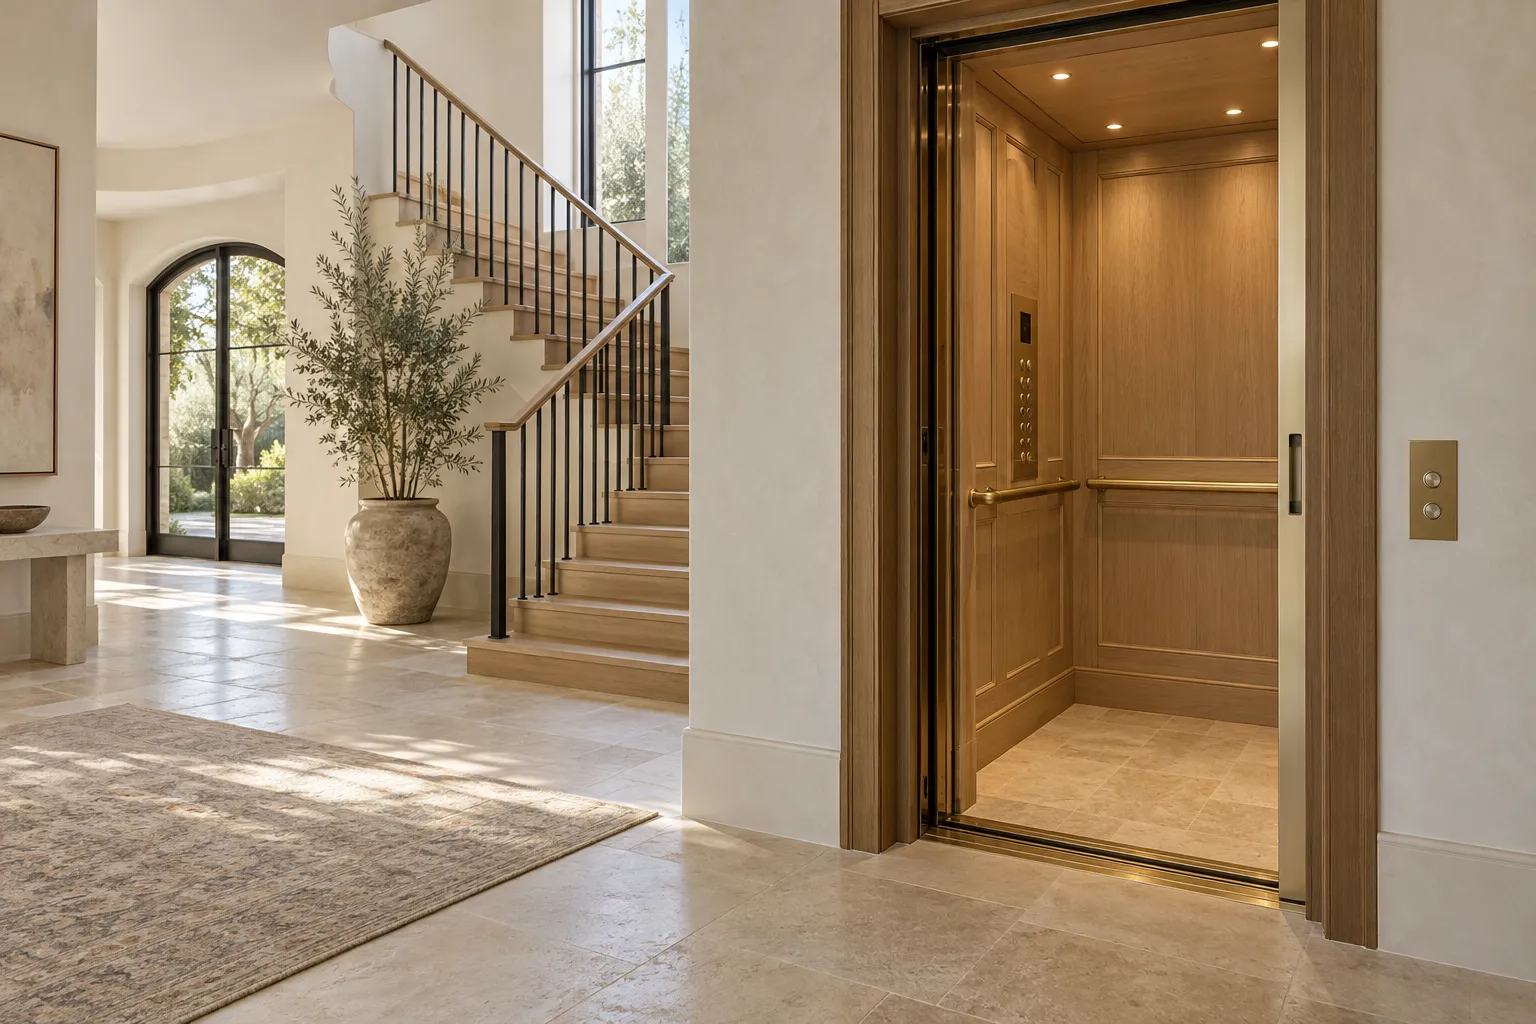
Elevator built into the open height of a two-story entry hall

Example project

Residential elevator with an open door and a wood-panel cab beside a stair in a stone-tile entry hall, an arched glass door behind
Home
2000s two-story house in Bellevue with a stone-tile entry hall and an open stair
Original request
An elevator that looks as finished as the entry it stands in
Shaft
Built in the open height beside the stair, landing at the upstairs gallery
Elevator
Closed elevator with a wood-paneled cab, ground floor and gallery
Building work
One floor opening at the gallery, the shaft framed and finished to match the entry, power, stone patched
Timeline
Close to three weeks of framing and finish work, plus ten days or so for the elevator
Estimated cost
$84,000

Scope of work

Drawings, a floor opening at the upstairs gallery, the shaft framed and finished in the entry, a power circuit, stone floor patched, the elevator with a wood-panel cab and doors at both floors, testing and the state elevator permit and inspection. Fees for engineering and the city permit come on top.

Project overview

In this example, the owners of a 2000s house in Bellevue have a two-story entry hall with an open stair and a gallery above. They want an elevator, but not in a closet at the back of the house.

The entry’s open height leaves room for a shaft beside the stair, so only the gallery floor has to be opened. The shaft walls are finished to match the entry, the stone floor is patched around the base, and the cab gets wood panels to suit the stair.

The goal

The goal is an elevator that suits the entry and reaches the bedrooms, with only one floor opened.

Process

  1. First visit Entry and gallery measured, the gallery framing and the stone floor checked.
  2. Drawings and permits Drawings for the shaft and its finishes, then the city and L&I permits.
  3. Weeks one to three Gallery floor opened, shaft framed, power run, walls finished, stone patched.
  4. Week four Cab, rails and doors put in over ten days or so.
  5. Handover Final tests, the L&I visit and a lesson on the controls.

Planning right

  • A two-story entry often has space for a shaft with only one floor to open.
  • Ask for spare stone or tile before the work starts. Matching it later is hard.
  • Protect the stair and the floor during the work. It is in this example’s scope.
  • Choose the cab panels with the stair finish in hand.

Get a free quoteMore about adding an elevator to an existing home
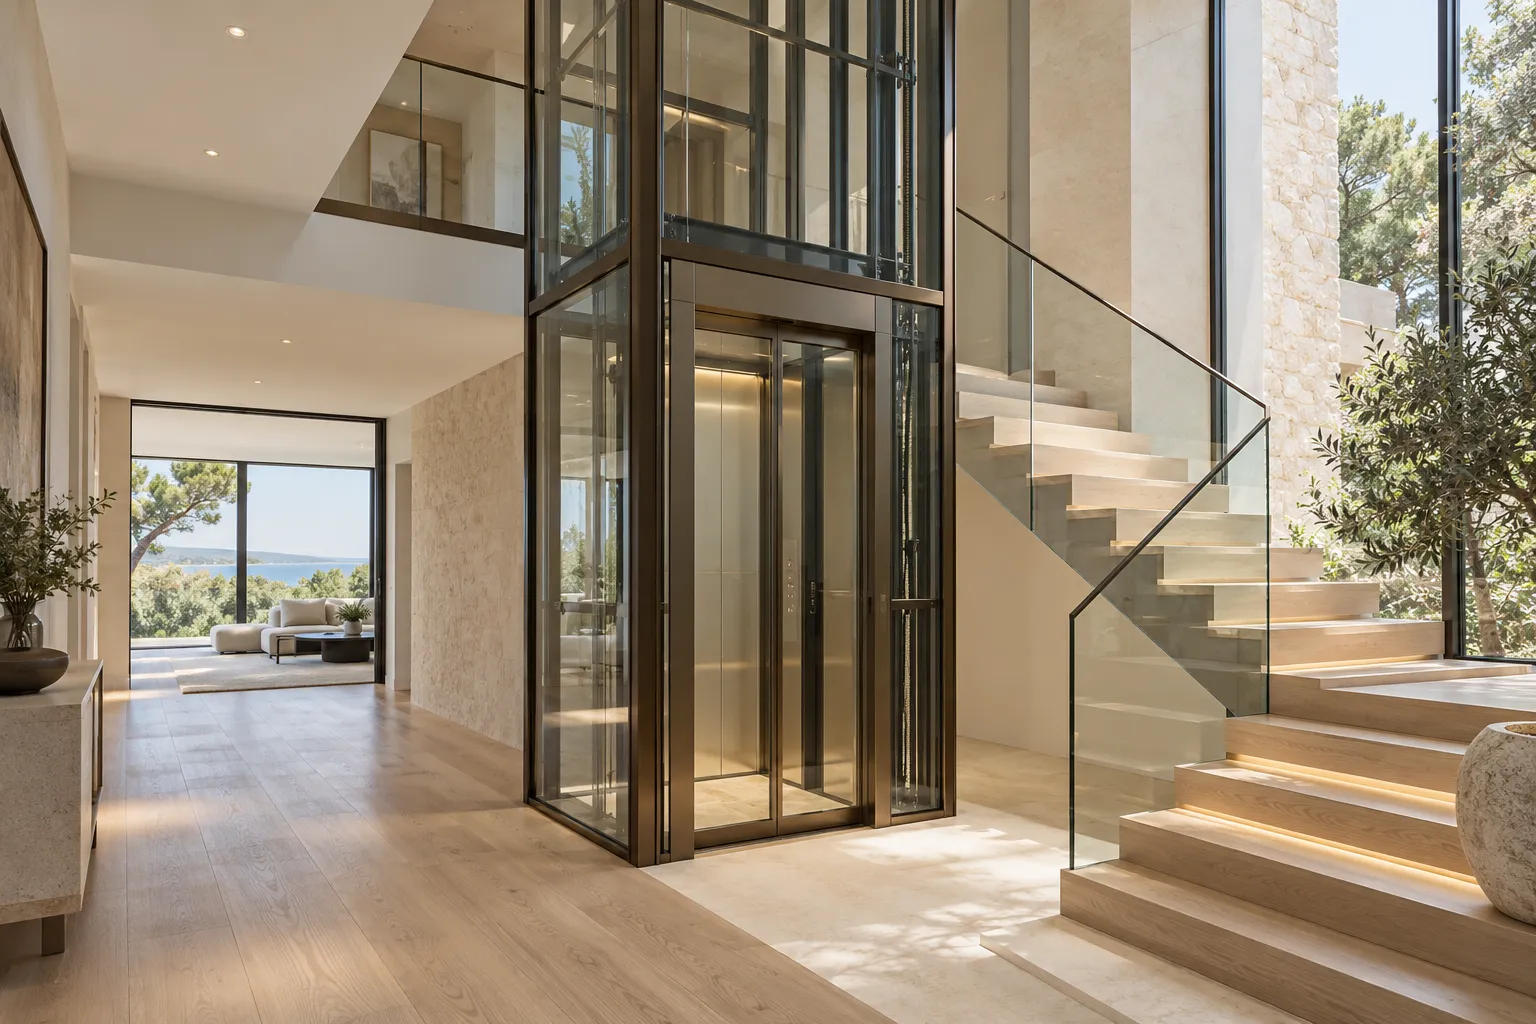
Choosing a glass-shaft elevator over a vacuum tube for two riders

Example project

Glass elevator shaft with a metal frame and sliding doors beside a floating stair, a gallery above and a living room with a water view behind
Home
2010s contemporary two-story house in Medina with a stair hall open to a gallery, and a water view
Original request
A see-through elevator that two people can ride together
Options weighed
A round vacuum elevator or a glass shaft with a larger cab
Choice
Glass elevator in a glass shaft, two stops, with a cab that takes two people
Spot
The two-story open space beside the stair; no floor cut, the gallery edge reworked for the upper door
Timeline
About a week of prep, then about two weeks for the shaft and elevator
Estimated cost
$124,000

Scope of work

The larger two-person cab in a framed glass shaft, its drive and sliding doors on both floors. Before that, the drawings, a shallow pit, wiring and a reworked gallery edge for the upper door. Finish work, testing and the state elevator permit and inspection are included.

Project overview

In this example, the owners of a 2010s house in Medina want an elevator they can ride together, and they want it to be see-through so the stair hall stays open. The stair hall already rises two stories to the gallery, so no floor has to be cut.

They compare two kinds. A round vacuum elevator needs no pit, but its largest cab is still tight for two adults. A glass shaft costs more and needs a shallow pit, but it holds a larger cab with sliding doors. They choose the glass shaft.

The goal

The goal is a see-through elevator that carries two people and leaves the stair hall open.

Process

  1. First visit Stair hall and gallery edge measured, the floor checked for the pit.
  2. Drawings and permits Pit and gallery work shown to the city for a permit; L&I permit for the elevator.
  3. Prep Shallow pit poured, wiring brought in, the gallery edge cut back for the upper door.
  4. Install Glass shaft, cab and doors set over about two weeks.
  5. Handover Final tests, the L&I visit and a lesson on the controls.

Planning right

  • See both kinds running before you choose. Size, sound and ride are different.
  • Stand in each cab with the person you will ride with. The inside size decides it.
  • A glass shaft shows its rails and cables. Ask what you will see from each side.
  • Ask for the weight limit of each option, not only the number of riders.

Get a free quoteMore about glass home elevators

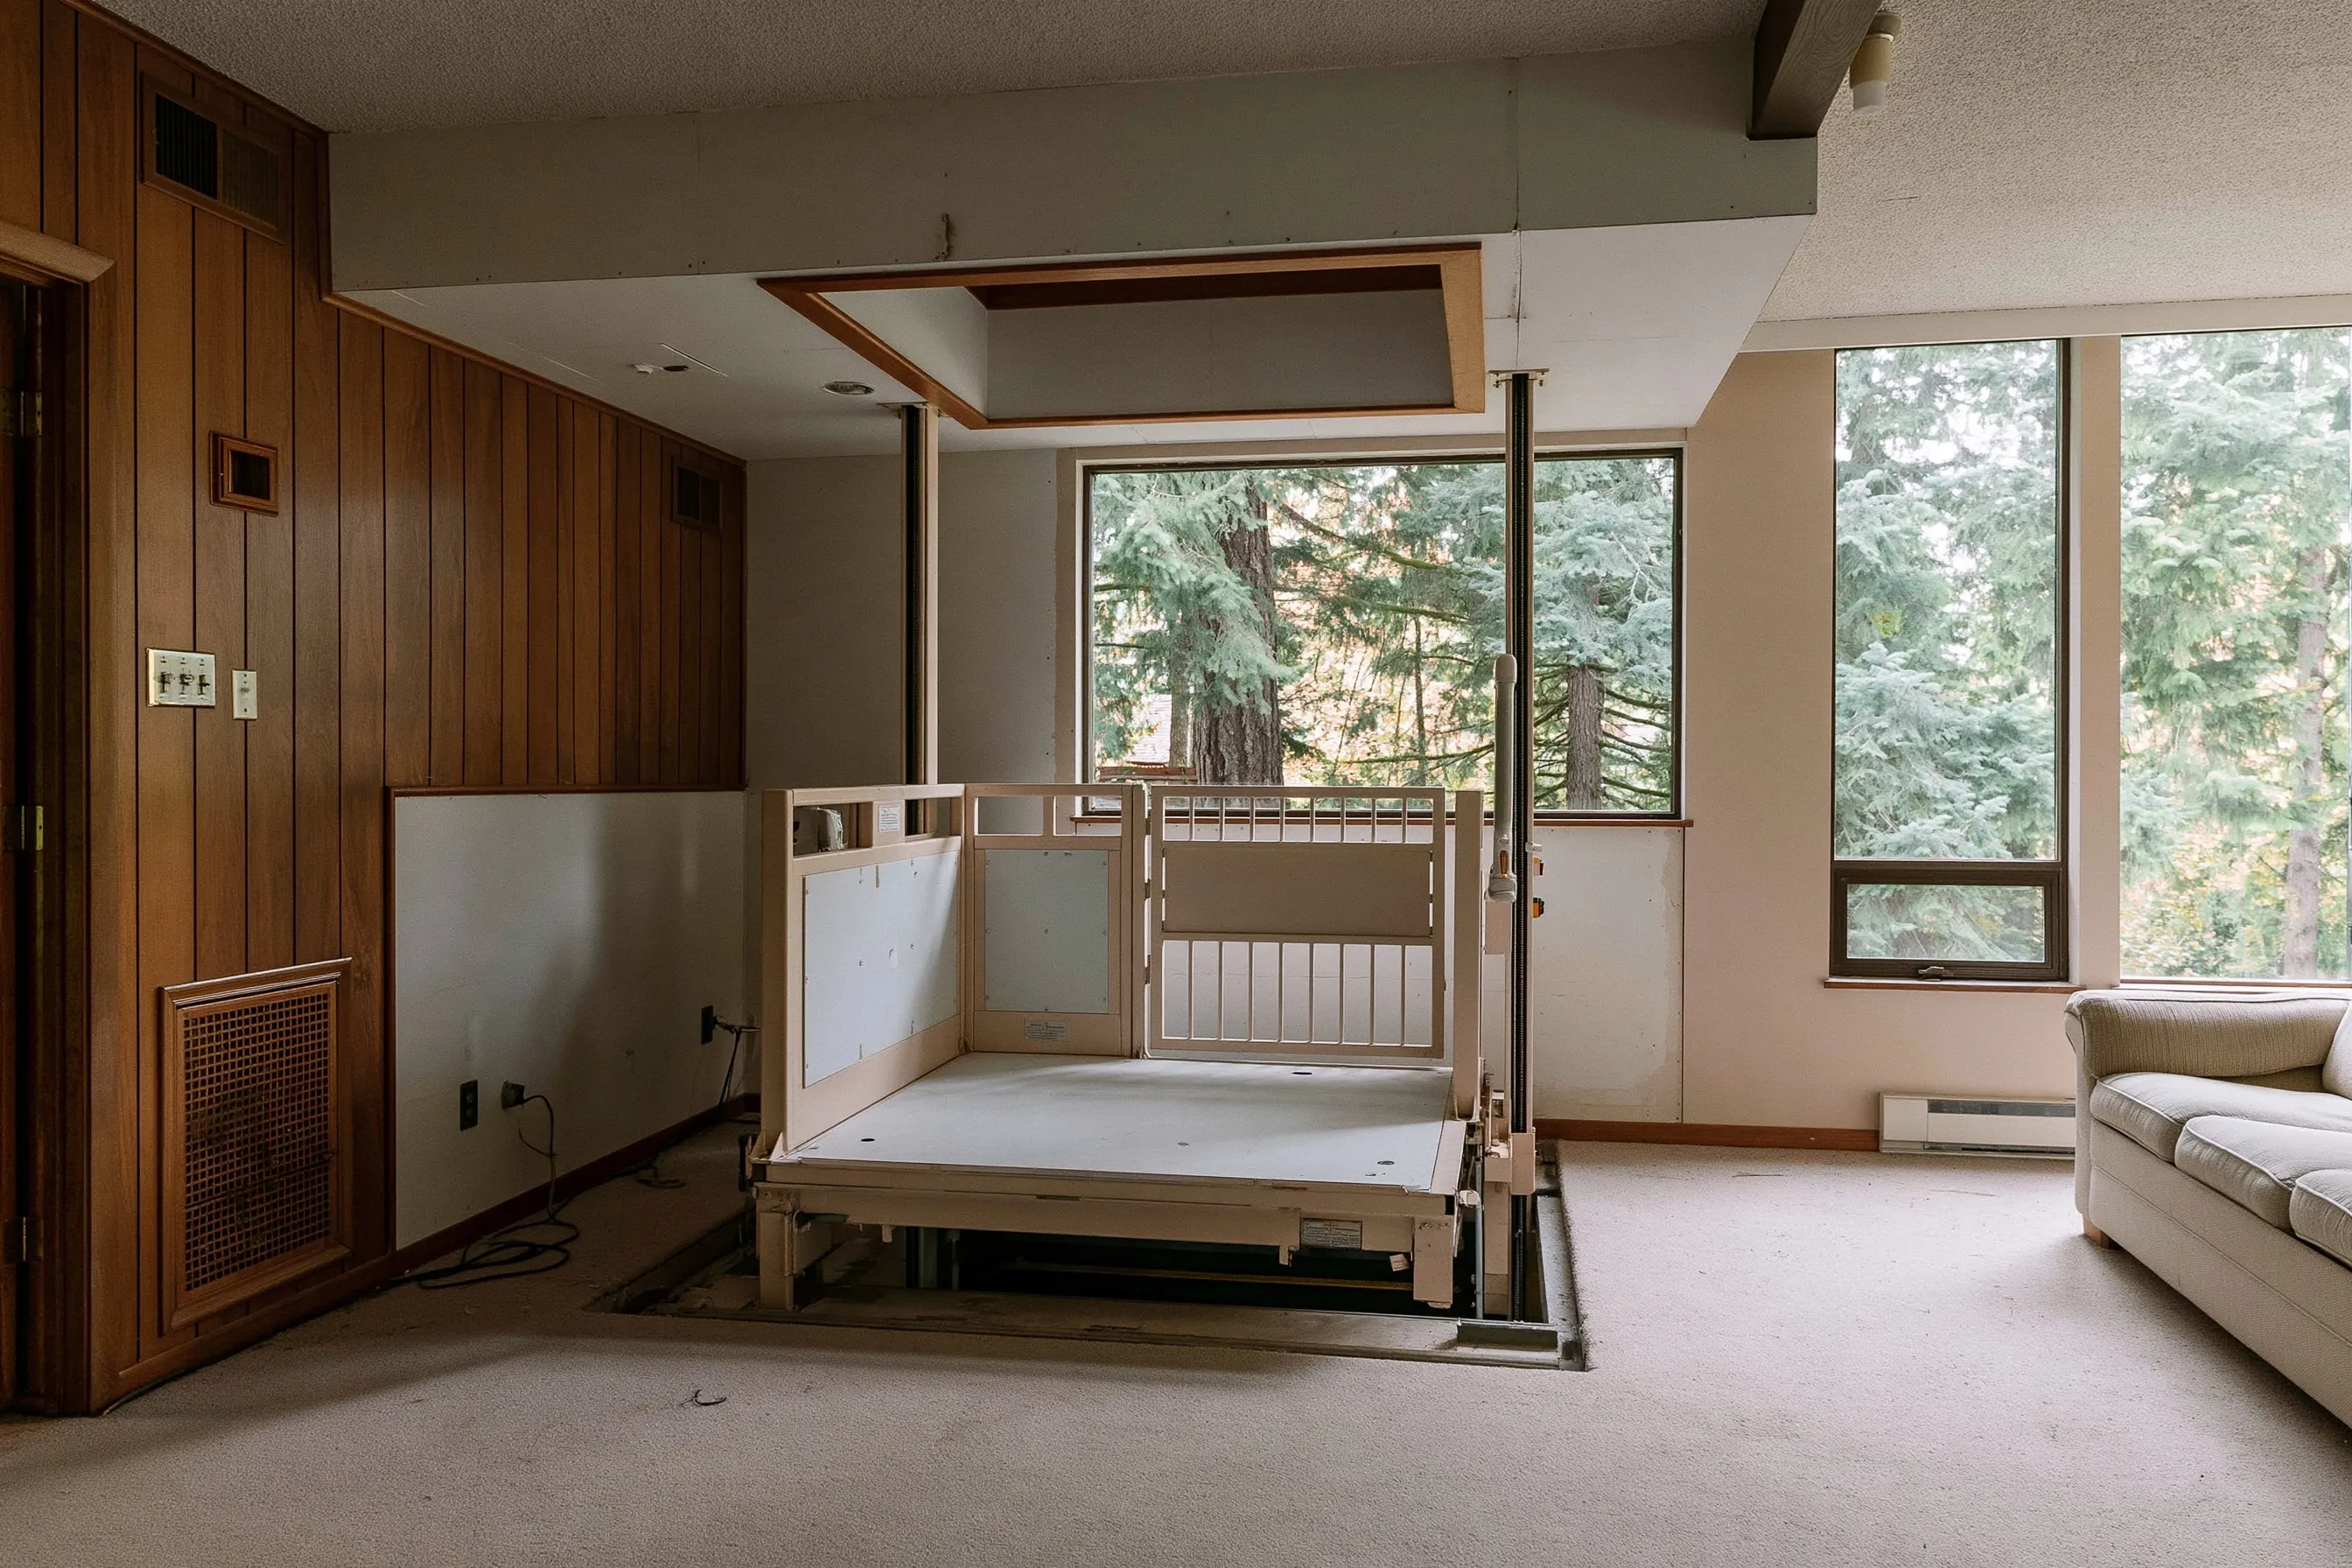
Wheelchair-size through-floor lift in a 1970s house

Example project

Wide platform lift with low side panels and a gate in the corner of a wood-paneled family room, under a framed opening in the ceiling
Home
Two-story Bellevue house from the 1970s with the bedrooms upstairs
Original request
Get a wheelchair user from the family room to the bedrooms upstairs
Lift
Through-floor lift with a platform for a wheelchair, two floors
Spot
A family room corner below a quiet part of the upstairs hall
Building work
A wider floor opening framed with new headers, a shallow recess so the platform sits level with the floor, power, trim at both floors
Timeline
Roughly one week on site after delivery
Estimated cost
$52,000

Scope of work

A wheelchair platform lift; a wider opening in the floor carried by new headers; a shallow recess in the family room floor so a chair rolls straight on; its own circuit; trim and paint on both floors. Testing and the L&I permit and inspection are in the price.

Project overview

In this example, one owner of a 1970s house in Bellevue now uses a wheelchair, and the bedrooms are upstairs. There is no stack of closets for a shaft, and the family does not want to give up a bedroom.

A wheelchair-size through-floor lift rides up through the ceiling of the family room into the upstairs hall. Its opening is wider than a seated lift’s, so new headers carry the floor around it. When the lift is upstairs, the family room corner is clear.

The goal

The goal is a wheelchair user who can reach both floors without help or a lost bedroom.

Process

  1. First visit Chair measured, both floors checked, joists and wiring above the corner found.
  2. Permit L&I elevator permit applied for.
  3. Week one Floor opened and framed with headers, power run, lift set and trimmed.
  4. Handover L&I inspection, then a trial run with the chair on board.

Planning right

  • Measure the chair with its footrests on. That sets the platform size.
  • The landing on each floor needs turning room for the chair.
  • Ask how the lift lowers if the power goes out with someone inside.
  • Ask whether the upstairs opening gets a gate or a cover when the platform is down.

Get a free quoteMore about shaftless home elevators

Request a free home elevator quote

Tell us which floors you want to reach, who will use the elevator, whether the house is built or still being planned and where it is. We'll get back to you soon with an estimate or any questions we have. Estimates are free and there's no obligation.

Call (425) 272-9208

Call (425) 272-9208